Best Doggie Doorbell:15+ Models Tested for Potty Training
Are you training your doggie doorbell manners, or does your furry friend incessantly scratch or bark at the door to go outside? You need a

If you’ve ever wished your dog could let you know when they need to go out or simply want to join you in the room, a dog doorbell might be the answer.
Creating your own DIY dog doorbell can be a fun and rewarding project.
In this comprehensive guide, we’ll explore the essential materials you’ll need to craft the ultimate dog doorbell and improve communication with your canine companion.
Crafting your own dog doorbell is not only a practical solution but also a creative endeavor. Let’s take an in-depth look at the key materials you’ll need to get started.
The first decision you’ll need to make is whether to use a button or a bell as the activator for your DIY dog doorbell. Both options have their pros and cons.
Buttons:
Buttons are easily accessible for dogs of all sizes.
They can be customized with various designs.
You can choose between wired and wireless button options.
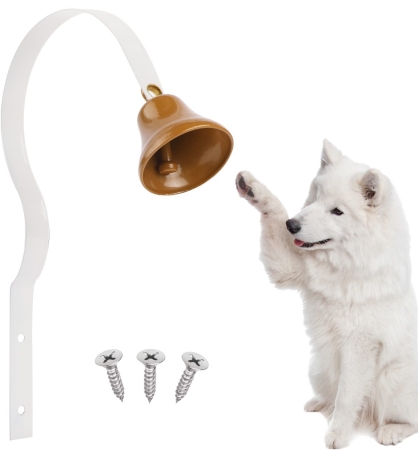
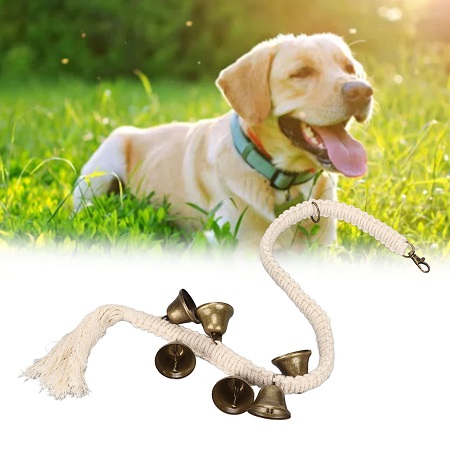
Bells:
Bells produce a classic ringing sound that’s easy to identify.
They add a charming aesthetic to your dog doorbell.
Some bells come in decorative designs.
For a truly unique DIY dog doorbell, you might even consider combining both buttons and bells. This hybrid approach can offer both tactile and audible cues for your dog.
To ensure that your DIY dog doorbell functions correctly, you’ll need wires and connectors to link the activator to the chime or receiver.
It’s essential to choose durable and well-insulated wires to prevent any damage over time. Opt for connectors that provide a secure and reliable connection.
When selecting wires and connectors, consider the length needed to connect the activator to the chime or receiver. Measure the distance accurately to avoid any issues during installation.
The chime or receiver is the heart of your DIY dog doorbell system. It’s the component that will alert you when your dog activates the button or bell. There are various options to consider:
When choosing a chime or receiver, think about where you’ll place it in your home. Make sure it’s within earshot so that you can hear your dog’s signal no matter where you are.
Depending on the complexity of your DIY dog doorbell, you may need a power source. Batteries are a common choice, as they offer flexibility and ease of installation.
However, some advanced doorbell systems can be hardwired into your home’s electrical system for continuous power.
If you opt for batteries, choose high-quality and long-lasting options.
Consider rechargeable batteries to reduce environmental impact and ongoing costs. Check the power requirements of your chime or receiver and ensure that the batteries you select are compatible.
Selecting the right materials for your DIY dog doorbell is crucial to ensure its effectiveness and longevity. Here are some factors to consider:
Take your dog’s size and behavior into account when choosing materials. If you have a large and strong dog, opt for sturdy buttons or bells that can withstand repeated use. Smaller dogs may do well with lighter materials. Additionally, consider the accessibility of the activator for your dog based on their size.
Consider how your DIY dog doorbell will fit into your home’s decor. Buttons and bells come in various designs and finishes, allowing you to choose one that complements your interior style. You can even personalize the activator with your dog’s name or a cute message to add a touch of uniqueness.
Some DIY dog doorbell materials require more complex installation processes, while others are straightforward.
If you’re not comfortable with extensive installations, choose materials that are easy to set up. Wireless options often offer simplicity in installation, making them a popular choice for DIY enthusiasts.
Now that you have a clear understanding of the materials needed let’s dive into the step-by-step process of creating your very own DIY dog doorbell.
If you’re feeling adventurous and want to take your DIY dog doorbell to the next level, consider incorporating advanced features.
To keep your DIY dog doorbell in top-notch condition, regular maintenance is essential. Here are some maintenance tips and troubleshooting guidelines:

Creating your own DIY dog doorbell can be a rewarding project that enhances communication with your furry friend.
By carefully selecting the right materials and following the step-by-step guide, you can craft a dog doorbell that suits your dog’s needs and your home’s style.
Whether you choose a classic button or a charming bell, your dog will appreciate the newfound way to communicate with you. Get ready to embark on this awesome journey of creativity and connection with your canine companion!