
Best Doggie Doorbell:15+ Models Tested for Potty Training
Are you training your doggie doorbell manners, or does your furry friend incessantly scratch or bark at the door to go outside? You need a

Do you need a way to know when your dog wants to come inside, but don’t want to splurge on an expensive doggy doorbell? With some simple, inexpensive materials, you can make your own DIY dog doorbell in no time!
In this article, I’ll walk you through the easy steps for creating a homemade dog doorbell on a budget using supplies you likely already have around the house. You’ll learn about different design options, from a basic bell on a string to more advanced electronic chimes.
I’ll also give tips on how to mount and install your DIY doggy doorbell properly so it will withstand use from excited pups.
By the end, you and your canine companion will have a custom, budget-friendly doorbell to signal when Fido is ready to come back into the house.
So let’s get started on how to make an inexpensive DIY dog doorbell with common household items!

To make your own budget-friendly DIY dog doorbell, you’ll need basic supplies like string and bells, a wooden board and screws for a chime bell, or an electronic doorbell kit and wiring.
The most basic DIY dog doorbell uses items you likely already have at home. All you need is string, bells, tape, and scissors.
Simply tie bells onto the end of a string to create your door hanger. Use tape to affix the other end of the string at your dog’s height on the door.
When your dog nudges the string, the bells will ring to alert you. This budget design takes just minutes to make and install.
For a slightly fancier DIY dog doorbell, you can make a chime bell version. Gather supplies like multiple bells, a small wooden board, screws, and a drill.
Drill holes in the wood board spaced for each bell. Screw the finished bell board securely near your entry door at your dog’s height.
As your dog paws at the bells, they will create a melodious chiming sound to notify you someone’s at the door! This creative chime bell is an easy craft that adds a musical twist to your DIY doorbell.
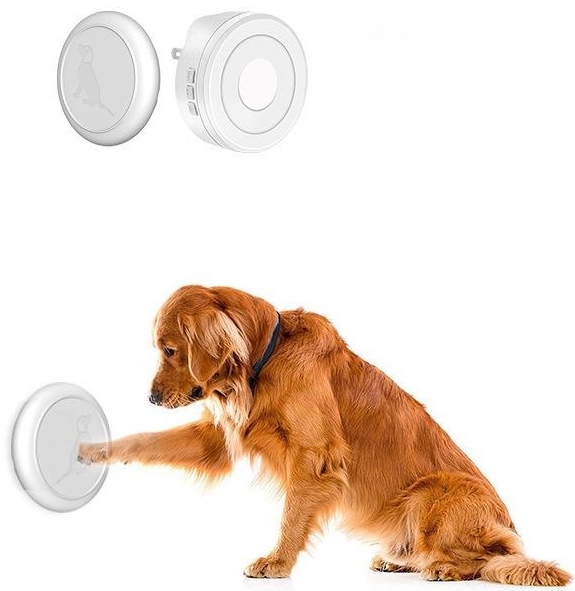
For a high-tech DIY dog doorbell, you can install a basic wireless electronic doorbell system. Purchase a doorbell kit with a battery-powered push button and chime receiver.
Mount the button outside at your dog’s height. Run wires from the button to the inside chime box and install them per included instructions.
When your dog presses the button with their nose or paw, the indoor chime will sound to alert you. This electronic DIY doorbell offers an affordable smart home feel without a complicated setup or high cost.
The instructions walk through creating three budget-friendly DIY dog doorbells, from a basic bell on a string to a chime bell on a wood board and a wireless electronic doorbell kit.
To make a basic bell on a string doorbell, simply gather string, bells, tape, and scissors, then tie the bell onto the string, and use tape to affix the string to the door and hang the bell at your dog’s height.
For the supplies you’ll need to make the basic bell-on-string doorbell, you likely already have the necessary items around your home, including string that you can cut to size, one or more bells to tie onto the string, tapes such as masking or duct tape to affix the string to the door, and scissors to cut the string.
To create your door hanger, take your piece of string and tie one or more bells securely onto one end, knotting the string several times to ensure the bell(s) stay tightly affixed and will not slip off when pulled or nudged by your dog’s nose or paws.
With the bell tied securely to the string, use tapes such as masking or duct tape to firmly affix the loose end of the string to your exterior door at the appropriate height for your dog to reach and ring the bell, ensuring the bell hangs down within easy access for your dog to alert you when they want to come inside.
For the chime bell doorbell, gather bells, a wooden board, screws, and a drill, then drill holes in the board for the bells, and finally screw the finished bell board securely near the entry door and hang the bells.
To make the chime bell doorbell, you’ll need to gather several supplies including multiple bells for a chime effect, a small wooden board to mount the bells on, screws to affix the board to the wall, and a drill with the right-sized bit to pre-drill holes in the wood board for installing the bells.
Once you have the wooden board for mounting the bells, use a drill to carefully drill holes evenly spaced across the board that corresponds with the number and size of bells you have, making sure the holes are large enough for the bells to fit securely inside but small enough to hold them on the board.
With the finished wood board ready with holes drilled for bells, firmly screw the board to the wall near your entry door at the right height for your dog, then place each bell securely into the pre-drilled holes so they hang freely and are ready for your dog to tap and make a chime sound whenever they want to come inside.
For the electronic doorbell, gather a kit, wire, and screws, mount the wireless button outside at dog height, install the chime receiver inside per the instructions, and run wires connecting the outdoor button to the indoor chime.
To make the electronic doorbell version, you’ll need to purchase a basic wireless doorbell kit that includes a battery-powered push button and a plug-in chime receiver, along with some wiring to connect the button and extra screws to securely mount the exterior button.
Once you have all the supplies for the electronic doorbell, determine the ideal height for your dog to be able to reach and press the button, then mount the wireless push button on the exterior wall near your entry door using screws to firmly affix it to your dog’s accessible level.
Follow the included directions with your wireless electronic doorbell kit to properly install the plug-in chime receiver inside your home, likely in an outlet near your interior door, so it will sound loud when your dog presses the button to come inside.
Once the exterior button is mounted and the interior chime is plugged in, wire them together by running wires from the outside button location safely along the wall and into the house, connecting them to the terminals on the indoor receiver, so the button press activates the chime to alert you to let your dog inside.
The article provides tips for properly mounting your DIY dog doorbell for durability, training your dog to use the doorbell, and troubleshooting any issues that arise.

No matter which DIY dog doorbell design you choose, proper mounting is key for it to withstand repeated use. Use sturdy tape or screws to firmly affix strings and boards.
Place bells and buttons where dogs can reach but out of the way of human traffic. Consider weatherproofing for outdoor components.
Check mounts regularly and resecure as needed so your DIY doorbell keeps working reliably for years.
Introducing your DIY dog doorbell takes patience and positive reinforcement. When first installing it, attract your dog to the doorbell with treats and praise.
Continue rewarding them for any interaction with the bell for a few days, then only reward the actual bell rings.
Ignore other door scratching/whining but immediately reward bell rings by letting them inside and giving treats. With consistency, your dog will learn to ring their bell properly when they want to come in.
DIY dog doorbells are prone to occasional issues. Check that bells are securely fastened and wires are properly connected. Replace batteries if needed.
Remount any loose components firmly. Ensure bells are hanging freely and buttons are easily accessible for dogs.
Retrain dogs consistently if they lose the habit. Muffle chimes if they become a nuisance. With patience, you can troubleshoot any problems that arise and get your budget doorbell working properly again.
Installing a DIY dog doorbell is an easy and affordable way to train your dog to politely alert you when they want to come inside.
With simple supplies you likely have on hand, you can create a customized doorbell solution tailored to your crafty skills and budget.
This article outlined options ranging from basic string bells to wired electronic chimes. While the installation instructions and required supplies differ, all these budget-friendly designs enable your dog to let you know when they are waiting at the door.
Just be sure to properly mount your DIY doorbell and consistently train your furry friend to use it. With a little patience, you’ll have a functional, homemade doorbell and a dog who happily rings it to come in from the yard or for a walk.