Have you ever wondered how to enhance your furry friend’s mode of communication?
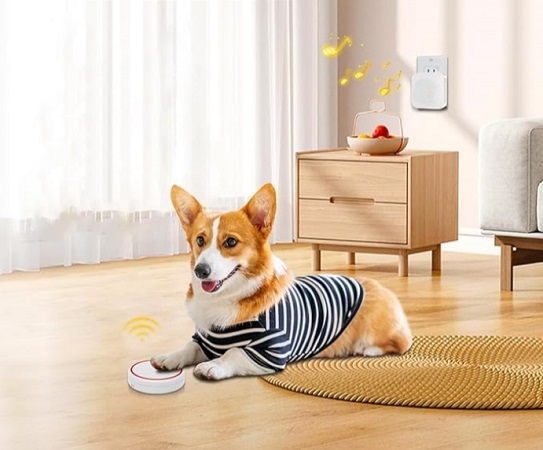
Imagine a world where your dog can signal you whenever they want to go outside or come back in, without resorting to barking or scratching the door. That’s the magic of a smart dog doorbell.
This innovative device not only fosters a unique bond between you and your pet but also introduces a fun, tech-savvy element to your home.
This comprehensive guide will take you on an exciting journey to create your very own dog doorbell, transforming an ordinary day into an extraordinary DIY adventure.
Preparing for your smart dog doorbell project
Your journey to create a customized dog doorbell begins with understanding its advantages.
It’s not merely an entertaining gadget; it’s a functional tool that empowers your pet to communicate effectively while enhancing your understanding of their needs.
Advantages of a smart dog doorbell
A smart dog doorbell offers several advantages that make it a worthwhile DIY project for any pet enthusiast. By installing one, you’ll enjoy benefits such as:
- Improved Communication: Your dog can easily signal their desire to go outside or come back inside, reducing the need for barking or scratching at the door.
- Enhanced Bond: This device strengthens the bond between you and your pet by allowing them to communicate their needs more effectively.
- Tech-Savvy Home: Introduce a touch of technology to your home while keeping your furry friend happy and satisfied.
Gathering materials and tools
To embark on this project, you’ll need some essential items. These include various types of sensors (such as motion sensors or proximity sensors), batteries, a bell or audio output device, and the brain of the operation – a microcontroller. Each component is user-friendly, and this guide provides detailed instructions on handling them with ease.
Materials required for your smart dog doorbell
Before you begin, it’s essential to gather all the necessary materials and tools for your DIY dog doorbell project. Here’s a list of what you’ll need:
- Motion Sensor or Proximity Sensor: Depending on your dog’s preferences and your home’s layout, choose the sensor that suits your needs.
- Batteries: Ensure you have a reliable power source to keep your dog doorbell running smoothly.
- Bell or Audio Output Device: Select an output device that will be audible and clear to both you and your pet.
- Microcontroller: This is the heart of your project and will control the device’s operation.
Designing the perfect dog doorbell
The heart of your DIY project lies in selecting the appropriate sensor. Will a motion sensor be the best fit for your dog, or would a proximity sensor work better? Each option brings unique functionality to your dog doorbell, and this section helps you make the best choice for your furry friend.
Choosing the right sensor for your dog doorbell
When designing your smart dog doorbell, the choice of sensor plays a crucial role in its functionality. Here’s a closer look at the two main sensor options:
- Motion Sensor: A motion sensor detects movement in its range. It’s ideal for dogs that are active and move around when they want to signal you.
- Proximity Sensor: A proximity sensor detects when an object or your dog is nearby. It’s a great choice for dogs that may not be as active or those who prefer to sit by the door quietly.
Consider your dog’s behavior and habits when deciding which sensor type to use in your dog doorbell project. You want to choose the one that best suits your pet’s needs and preferences.
Simplifying the assembly process
This section breaks down the assembly process into easy-to-follow steps. You’ll learn how to connect the sensor, power source, and bell, ensuring every connection is secure.
The guide provides detailed illustrations and tips for a hassle-free assembly experience, making it suitable even for those new to DIY electronics.
Assembling your smart dog doorbell
Now that you have gathered all the required materials and chosen the right sensor for your dog doorbell, it’s time to start assembling the device. Follow these simplified steps to ensure a smooth assembly process:
- Prepare Your Workspace: Set up a clean and organized workspace with all your tools and materials within reach.
- Connect the Sensor: Begin by connecting your chosen sensor to the microcontroller. Follow the manufacturer’s instructions for proper wiring.
- Attach the Bell or Audio Output Device: Next, connect the bell or audio output device to the microcontroller. Make sure the connection is secure to ensure a clear and audible signal.
- Install Batteries: Insert the batteries into the power source, ensuring they are properly placed and have enough charge.
- Secure Components: Use fasteners or adhesive to secure the components in a suitable enclosure, making sure they are protected from the elements.
- Test Your Doorbell: Before finalizing the assembly, test your smart dog doorbell to ensure all components work correctly.
Customizing with easy programming
Here’s where you get to add your personal touch. You’ll have the opportunity to program your dog doorbell, adjusting its response to your dog’s interactions. This section covers basic programming principles, tailored for beginners, with step-by-step instructions to customize the doorbell’s sound, volume, and more.
Customizing Your Smart Dog Doorbell’s Features
Programming your smart dog doorbell allows you to customize its features to suit your pet’s specific needs and preferences. Here’s how you can easily program your dog doorbell:
- Access the Microcontroller: Connect your microcontroller to a computer or device with programming capabilities. Follow the manufacturer’s instructions for accessing the programming interface.
- Customize the Sound: Modify the doorbell’s sound to something pleasant and recognizable for your dog. You can choose from a variety of tones and melodies.
- Adjust Sensitivity: Fine-tune the sensitivity of the sensor to ensure it responds accurately to your dog’s actions without being overly sensitive to other movements.
- Set Volume Levels: Adjust the volume levels of the doorbell to a comfortable and audible level for both you and your pet.
- Add Special Features: If you have more advanced programming skills, you can add special features such as LED indicators or smartphone notifications.
- Test and Refine: Test the customized settings with your dog to ensure they respond as expected. Make any necessary refinements to improve usability.
Ensuring your dog doorbell functions flawlessly
Once your dog doorbell is assembled, it’s crucial to ensure it works as intended. This chapter focuses on how to effectively test the doorbell’s functionality, offering tips for troubleshooting common issues. Whether it’s sensitivity adjustments or connectivity problems, this section ensures your creation operates smoothly.
Testing and troubleshooting your smart dog doorbell
To ensure your smart dog doorbell functions flawlessly, follow these steps for testing and troubleshooting:
- Test Sensor Sensitivity: Check if the sensor responds appropriately to your dog’s actions. Adjust the sensitivity if needed to prevent false activations.
- Sound Check: Ensure that the doorbell produces a clear and audible sound when activated. Adjust the volume as necessary.
- Range Testing: Verify that the sensor’s range is suitable for your home’s layout and your dog’s movements.
- Battery Life: Monitor the battery life and ensure it lasts for an extended period. Replace batteries when necessary.
- Connectivity: If your dog doorbell has connectivity features like smartphone notifications, test their functionality to ensure they work as intended.
- Address Common Issues: Troubleshoot any issues that may arise during testing, such as sensor misalignment or loose connections.
Installation and everyday usage
Discovering the optimal location for your dog doorbell and understanding its daily use are key to its success. This section guides you through the best practices for installation and everyday usage, ensuring the doorbell is easily accessible to your pet and functional for your home setup.
Installing and using your smart dog doorbell
Now that your smart dog doorbell is fully functional, it’s time to install it and integrate it into your daily routine. Here’s how to do it effectively:
- Choose an Ideal Location: Install the doorbell at a height and location accessible to your dog. Ensure it’s weatherproof if it will be installed outdoors.
- Training Your Dog: Teach your dog to use the doorbell by associating it with going outside or coming back inside. Use positive reinforcement and rewards to reinforce this behavior.
- Establish a Routine: Incorporate the use of the smart dog doorbell into your daily routine with your pet. Make it a part of your walks and playtime.
- Monitor Usage: Keep an eye on how frequently your dog uses the doorbell and responds promptly to their signals.
- Maintain Accessibility: Ensure the doorbell is always within your pet’s reach, especially when they need to communicate with you.
- Consider Multiple Doorbells: If you have multiple entrances or a large property, consider installing multiple dog doorbells for convenience.
Maintaining your dog’s doorbell in top shape
Regular maintenance is essential for the longevity and effectiveness of your dog’s doorbell. This part of the guide covers routine upkeep, cleaning tips, and exciting upgrades to keep your device up-to-date and functional.
From managing batteries to implementing software updates, you’ll learn how to maintain your doorbell in prime condition.
Maintaining your smart dog doorbell
To keep your smart dog doorbell in top shape, follow these maintenance tips:
- Battery Management: Regularly check and replace the batteries to ensure uninterrupted functionality.
- Cleaning: Clean the sensor and bell components periodically to remove dust and debris that may affect performance.
- Weatherproofing: If your doorbell is installed outdoors, inspect it for weather damage and make any necessary repairs or replacements.
- Software Updates: Stay up-to-date with any firmware or software updates provided by the manufacturer to improve performance and security.
- Troubleshooting: Be prepared to troubleshoot and address any issues promptly to prevent prolonged downtime.
- Upgrades: Consider adding new features or enhancements to your dog doorbell as technology evolves.

Conclusion
Creating your own smart dog doorbell is more than just an enjoyable DIY project; it’s an enriching experience that deepens the bond between you and your pet. It’s a fusion of creativity, technology, and practicality that adds a new interactive dimension to your home.
This project not only enhances your dog’s communication but also brings a sense of accomplishment and joy to your DIY endeavors. So, grab your toolbox, unleash your creativity, and embark on this fulfilling journey. Your pet will express their gratitude, and your home will be all the smarter for it.
Embrace the DIY spirit and let the adventure with your furry friend begin with your very own smart dog doorbell.
It’s a project that promises enjoyment, learning, and a stronger connection with your beloved pet. With the comprehensive knowledge and guidance provided in this guide, you’re well-equipped to create a personalized dog doorbell that will delight both you and your canine companion.